Quick Start Guide
- Create an Octave account
- Follow the onboarding steps to add your first product to the Library
- (Optional) Create a Motion to generate more precise messaging
- Add the Octave Clay Template to your workspace
Connecting the API
-
Get your API key:
- Go to the Developers tab
- Generate an API key for your workspace
-
Set up the Clay template:
- Copy the Octave Clay Template to your workspace
-
Find the HTTP API columns labeled:
- Octave Enrich Person
- Octave Enrich Company
- Octave Sequence
- Personalize Template
-
Enter your API key in each HTTP column where it says
INSERT_OCTAVE_KEY_HERE - Save your changes
- Build an Agent
- Build your first Agent here in Octave. Test and tinker with your agent in Octave and when you are ready save it and grab the Agent ID.
-
Set the
agentOIdvalue in your Clay column and you are good to go!
-
Test the integration:
- Insert a person profile into the table
- Run some of the columns/cells
- Note: First API call may take longer than subsequent calls
Clay Integration Tips
Save as Templates
Save Octave HTTP API columns as templates for easy reuse across multiple Clay tables.Export from Octave to Clay
-
In Clay:
- Choose “import” from actions
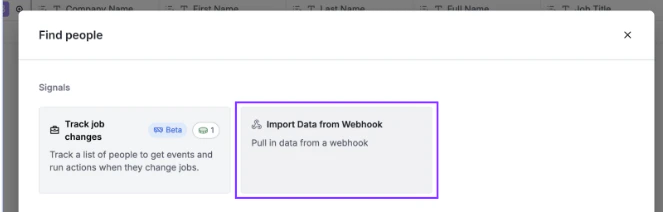
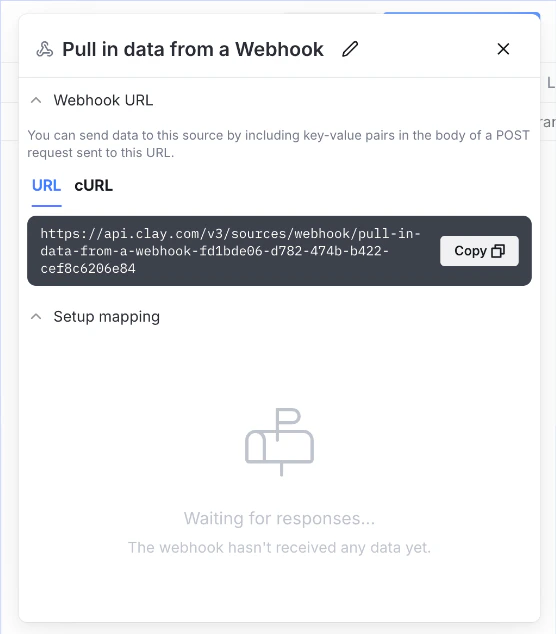
- Select “import data from webhook”
- Copy the webhook URL
-
In Octave:
- Go to Search or any List
- Click export
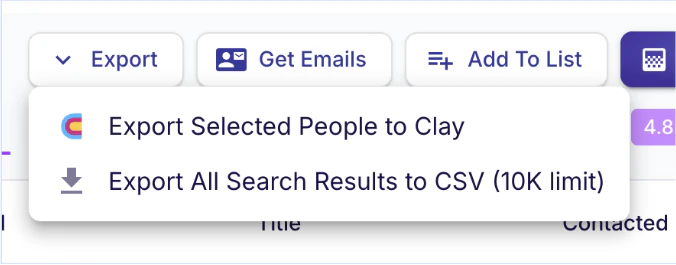
- Select “export to Clay”

- Input the webhook URL
- Save webhook for future use